In Part 1, we were introduced to VRM Switzerland’s newly certified H125 FTD.
After a few minutes of familiarization and a traffic pattern, I wanted to experience the authenticity of this system to replicate the conditions with mountain flying. Nils Werder, VRM Switzerland account executive, repositioned the scene to a glacier under the Matterhorn. The area had almost zero surface texture, which accurately characterizes landing on snow or glacier surfaces under a variety of lighting conditions. The landing site had a considerable slope, as well as winds from an adverse azimuth. What an impressive learning setting! This is exactly one of the prime situations that screams “watch out” in the real world and is definitely not a “training friendly” scenario.
The visual replication of the topography was realistic. From one direction the sun’s angle would “hide” the indentations in the glacier’s surface, then as I repositioned the helicopter to different directions of the sun’s angle, that reflection of the sun from the indentations revealed the rough undulations of the glacier-- just like in the real world!
During an approach to landing on a ridge Werder programmed a ridge-top wind. The downdraft while on the lee side of the ridge was immediately apparent. It also contained the turbulence that one would expect downwind from a ridgeline.
Emergency Procedure Training
The training for mechanical malfunctions such as autorotations is risky, time-consuming and expensive when done in an actual rotorcraft. Unrecoverable consequences can quickly occur if the pilot’s inputs are incorrect, insufficient, excessive or poorly timed during mechanical malfunctions such as tail-rotor failure. How do we adequately prepare pilots for this critical maneuver in all phases of flight and in less-than-ideal conditions without causing so many accidents?
Helicopter pilots do not receive any hands-on training in vibrations. Their training is little more than reading a few paragraphs that attempt to educate the pilot on the differences in vibrations between impending failures in the main rotor, tail rotor or with icing. During my demonstration, Werder selected these malfunctions so I could feel the difference in the flight controls and the seat. It was a “total body immersion” with my hands, feet, butt, ears and eyes. What an effective learning experience!
“With this type of simulator, you can put the pilot in operational situations that would be very risky in real flight but which bring a significant added value to training. It is true for emergency procedures but also for scenarios like flying in weather conditions that gradually deteriorate,” says Gilles Bruniaux, head of product safety at Airbus Helicopters.
Instructor Station
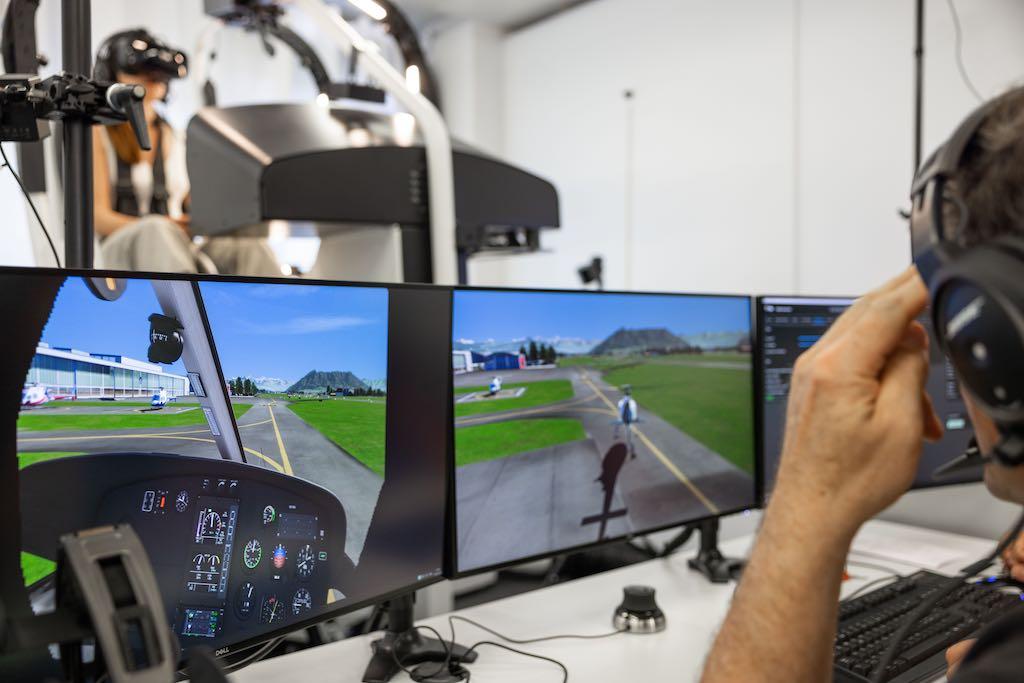
The simulator’s instructor operating station is intuitive to operate and enables the instructor to quickly set up lessons and adjust parameters during training. During the demonstration Werder showed the simplicity of making changes in weight and balance, lighting, visibility, weather, turbulence and scenery.
The instructor operating station has three displays. One of them shows where the pilot is looking. This is an ideal teaching tool because it allows the instructor to directly determine if the student is looking at the right instruments or visual scenery for the maneuver. Another display panel can display the instrument panel as if sitting in the cockpit. It includes a useful feature in which the instructor can “point” to a specific gauge to show its reaction during an abnormality.The third panel allows the instructor to quickly amend the atmospheric conditions, flight location, lightning, visbility, as well as aircraft system status. The instructor can choose to induce vibrations, tail rotor shaft failure, governor overspeed and many other mechanical failures.
Another notable aspect is the programming, which will show the trainee the correct set of control inputs to make. For basic training, single controls can be handed over to the student while other axes are controlled by the computer. This avoids overloading the trainee, and step-by-step learning results in faster and constant progress.
Small Footprint and Portable
The infrastructure needed to run a standard Level D flight simulator includes a vast hydraulic system, reinforced extra-strength concrete floors to support the weight of the simulator, a large amount of physical space, stacks of computers to support the system, and, of course, a massive air-conditioning system to keep these systems from overheating. Even the simpler flight training devices used at helicopter flight schools need a considerable amount of floor space.
Compared to these other visual display systems, the virtual reality goggles require virtually no dimensional footprint, since no large-sized domes, mirrors, projectors or screens are required. This conveniently eliminates concerns about edge blending/overlapping, distortion, elaborate calibration or costly, tremendous computing power. The VRM system requires about 215 sq. ft. and is comparatively light (1,279 lb.). The entire system requires one small computer.
After the hands-on demonstration, Werder and Simon von Niederhäusern, head of VRM’s marketing, showed me the self-contained trailer that houses an entire VRM system. This will be especially important to an operator that has a number of out-stations. The entire system can be transported between an operator’s out-stations to provide recurrent training and checking without the pilots having to travel to a simulator center. Besides the obvious training benefits, this eliminates the costs of pulling a pilot off the flight schedule and sending them to a simulator training center.
In Part 3, we’ll discuss how this FTD allows the pilot to train for emergency situations in a safe and highly realistic environment, which is often not possible in an actual aircraft.


